Tag: Lowe’s home improvement
Stucco Series – Tools and Toys
by admin on Jul.13, 2011, under Favorites, Images, Real Estate
When it comes to a stucco project, playing in the sand takes on a whole new meaning.
This is not a clean and easy project. It’s hard work, with heavy lifting at times, and lots of reaching and bending. A few specific tools are absolutely necessary. Water – as both a tool and an ingredient – needs to also be at ready supply and access.
If you enter through the Contractor’s Entrance at any Lowe’s Home Improvement and bear left, you’ll likely find bins with most of the Masonry and concrete tools you’ll need – along with cement, sand, and lime (and usually some powdered concrete colorant,) stacked along the far wall. If you’re having a really lucky day, you might find a Masonry Professional enjoying a few spare minutes out of the weather and buying his own supplies – and he might be willing to give you some input if asked.
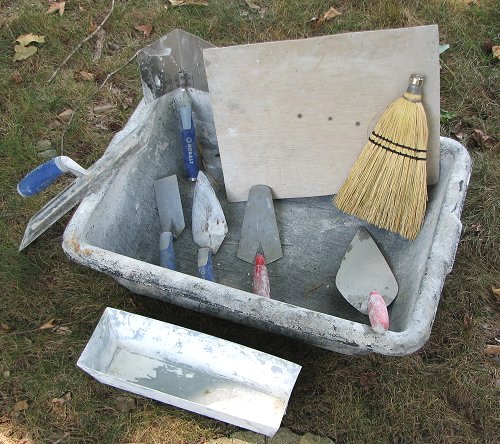
Toys, I mean tools…
Most of these were purchased at Lowe’s – many are Kobalt brand which proved to be a little more expensive but proved to be very sturdy. Bon-Tool (online) also has a huge assortment though a lot of their products are geared for the professional trade. I think most of these items are self-explanatory with a few notes.
A hawk was not purchased for this project – one was made by taking a section of shingle that happened to be lying around and nailing a block of wood centered on one side. This worked fine here, you may prefer to purchase.
The little winged Kobalt tool standing in the left upper corner of the mixing tray was supposed to be used for corners. I found it a waste of time. If your metal lath, scratch and brown coats are done with care, corners can be done with the other trowels.
I started with smaller trowels since the wall had separate and small sections anyway. I felt this work in my wrists and arm muscles for about the first two days. After that, and after gaining more confidence, I moved on to using more mixture, a larger trowel, and began getting stucco applied in a much more efficient manner.
The whisk broom was used to smooth the brown and finish coats – again this is based on your finish preference.
Most of these items run from $10 to $20 a piece. Throw in a tray to mix it all in and you’re ready to begin! All of this was mixed by hand. Until the arrival of the cement mixer…more on that purchase later… (Updated 11/14/2011)
For now, let’s figure out how to get this stuff on a wall…
Stucco Series – From the Ground Up
by admin on Jul.04, 2011, under Favorites, Images, Real Estate
On with the project…
Removing the dirt from the back of the house (see first post), and installing a French drain was a good step in this home improvement process. But the back door was still stuck and the roof had a sway like a camel’s back you can see in image below.
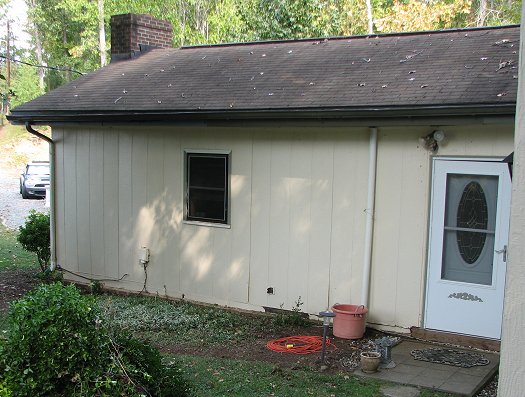
On closer inspection we found the house had evolved from a foundation of wooden posts and railroad ties. After 50 years, the wooden posts were nothing but sawdust leaving the railroad ties resting directly on the ground.
What to do now? We came up with 3 options…
Bulldoze the entire house. Not bloody likely since we are actually living here. Who knows what the mortgage company would have to say.
Hire a contractor. Given that we couldn’t get a local company to come out and replace gutters, we were not confident that anyone could solve this problem. Without a standard foundation wall, hiring a wall-lifting or using a helical pier system like Ram Jack couldn’t even be considered
Fix it ourselves. We chose this option by default.
Using a simple hydraulic jack and heavy timbers we reinforced and leveled the roof – setting the vertical posts on hand-poured concrete footings.

We finished the base of the wall along its entire length with hand-poured concrete. I mention hand-poured concrete twice here because you may be surprised to find that it took 30 bags of Quik-Crete to accomplish this task. Hand mixing Quik-Crete is not a “quick” nor easy process.
Now we have a square, level, functional but bland wall. It still needed something. Let there be light!
In older homes drafty and undersized windows are a chronic problem. Nothing improves the comfort of the home like energy-efficient dual-pane windows. Big box home improvement retailers have a wide variety to choose from at very reasonable prices. The small window in the wall needed to be replaced and at the time, this was the only window in the living room. We needed a new and bigger option.
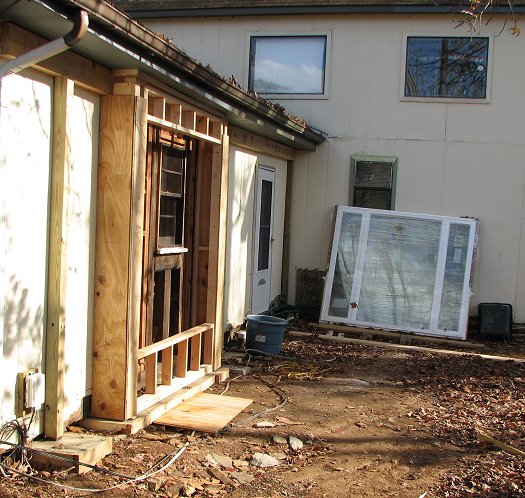
We considered a 3 x 3 foot window and a 4 x 4 foot window. We finally settled on a 7 foot wide by 6 foot tall monster window unit. Apparently this monster window was the subject of much awe and desire by all who viewed it at Lowe’s! Such a substantial window now needed a substantial wall. As with so many projects, what started out as a simple hole in the wall for a window, grew to a framed-out box to add character.
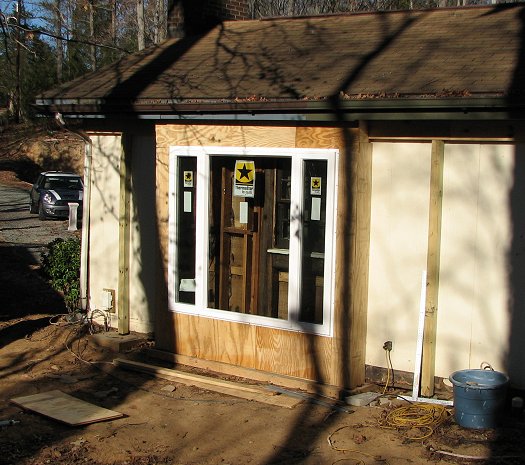
Now to secure the wall and make it weather-tight. We chose stucco.
The wall type had to be weather-tight, well insulated, and attractive – and affordable. We’d never done stucco before but we liked the look for our country cottage. Time to research stucco…