Tag: paver stones
Hot Summer Temps Coming
by admin on Jun.27, 2012, under Favorites, Images, Real Estate
After a beautiful and fairly cool day yesterday, I looked at the weather for this coming weekend and saw “105″ for Saturday and “103″ as the high temperature forecast for Sunday! Oh no…
Good thing I’ve had a break to do a little work around the yard. Anyone following the Stucco Series or who has been interested in the paver molds and pavers we’ve made might be interested to see the current phase of the long-running patio project.
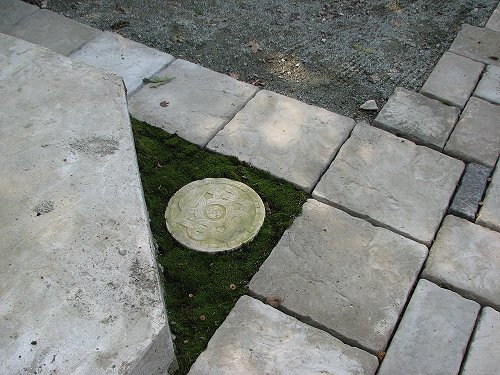
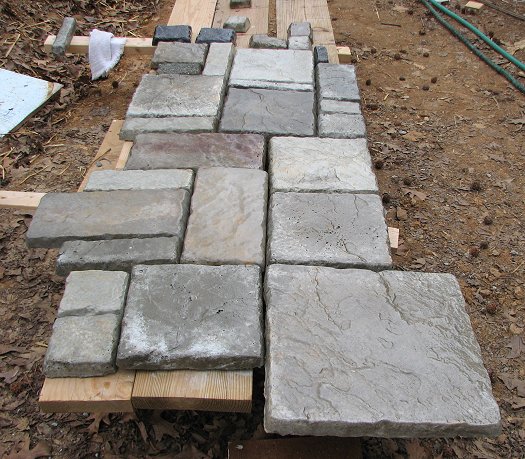
Having decided on a pattern for our pavers and having decided that using too many small pavers made the design look too busy, I still thought paver-after-paver just looked a little bland. Fortunately, I have access to a LOT of nice and green, healthy moss. I’m going to use moss around some of the pavers to break the texture a bit and give this 2012 patio a bit of old-world look.
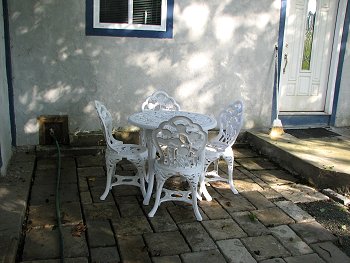
You can see a bit more of our paver pattern here – and that I’m leaving small sections open for moss. I’ll also use the moss like caulk in the event any spacing between pavers ends up a little wider than was planned. I also get to show off my little Bistro table and chairs I just purchased – in the event I ever find time to sit down!
With summer temperatures right around the corner, this area being shady most of the day will make it a great place to hang out and drink morning coffee or read, or in which to just sit and do nothing!
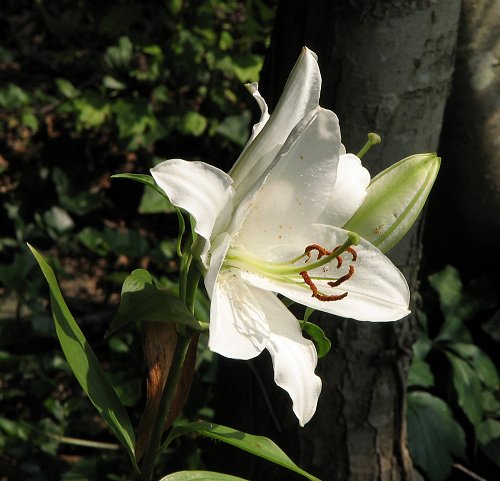
I planted some white lilies just off the new patio area in hopes that sometime while they’re blooming, I’ll have time to sit and enjoy them. They are blooming now and I’m still playing a bit of catch-up, but with this scenery, who cares?
Homemade Stone Pavers
by admin on Sep.17, 2011, under Favorites, Images, Real Estate
If you’ve followed any of the “Stucco Series” posts, you’ll have seen an image or two of some homemade patio stones. There has been a little break in the stucco project since working outdoors – with temperatures approaching 100 degrees a few days – was just not fun.

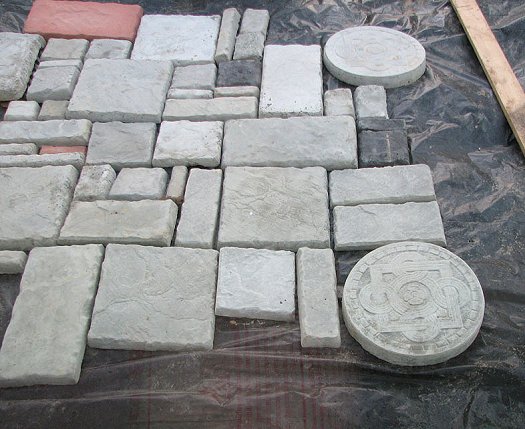
But now most of the heavy-duty aspects of the redesign of the backyard area are all but complete and it’s time to contemplate a pattern for the paver stones we’ve produced. Here’s what we’ve come up with so far:
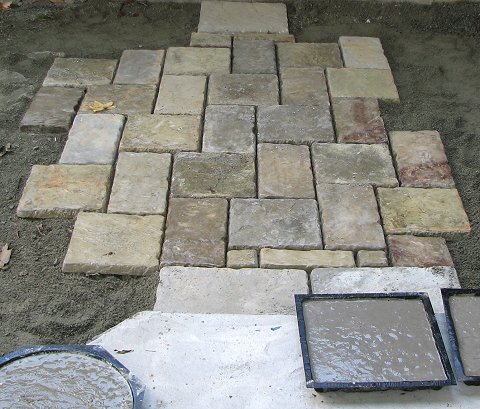
This image also gives you a look at several of the stone molds from The Mold Store – filled with their “mixture.”
Defining “mixture”…
The easiest choice is Sakrete. For about $4 a bag this mix includes everything but the water.
The less-easy choice is still as easy as one-two-three…
~ One shovel of cement.
~ Two shovels of sand.
~ Three shovels of gravel.
Blend the mixture while still dry, add water, and stir.
Take your time adding water since you can’t take it out later if you use too much. The less water you use, the stronger your concrete will be. But, for our purposes we wanted a wetter mixture of concrete so it conforms to the mold completely – without gaps.
We’ve been really pleased with the Celtic Knot stones shown in a prior post but we haven’t decided for sure whether or not they will be incorporated into this section of the patio design.
More on patio and paver design coming soon! And a new post on stone color considerations. (November 2011)
Stucco Series – Reboot
by admin on Jul.01, 2011, under Favorites, Images, Real Estate
Or maybe I should say, “Re-pour!”
I began what I called the “Stucco Series” a few weeks ago and then immediately realized I had started in the middle of the process. I also didn’t have the 9 months worth of info well-organized so…
…starting again – with the paver stones that began this latest round of DIY home improvements.
We started off wanting to make some of these:
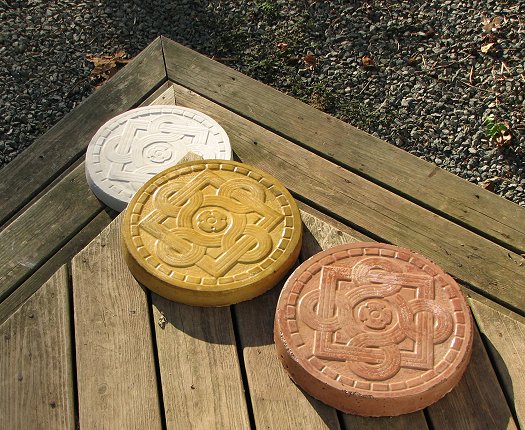
We ordered a package of molds from The Mold Store. They’ve been a really handy resource and have been able to answer our questions about mold sizes and concrete colorant.
As you can see from the image above, we’ve been experimenting with various color effects – the latest being true white – which was harder to achieve than might be imagined. More on that later…
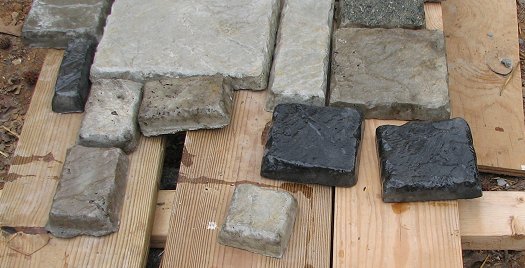
The pavers look like this in their raw state:
We weren’t super happy with this so decided a coat or two of polyurethane might bring out the texture and color variations to make these pavers look a bit more natural. It worked!
I was particularly pleased with the black pavers.
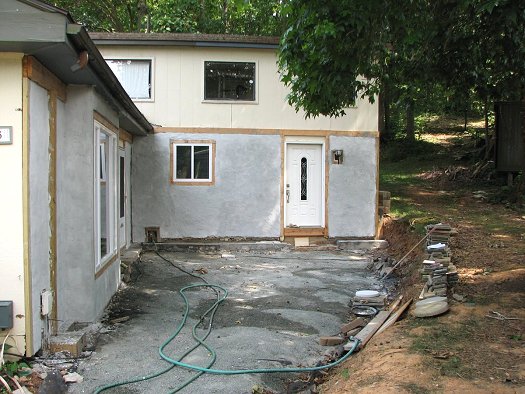
The stucco thoughts began as we were studying the “before” back of the house. This is the area intended for the new patio (and pavers), but there were obvious problems.
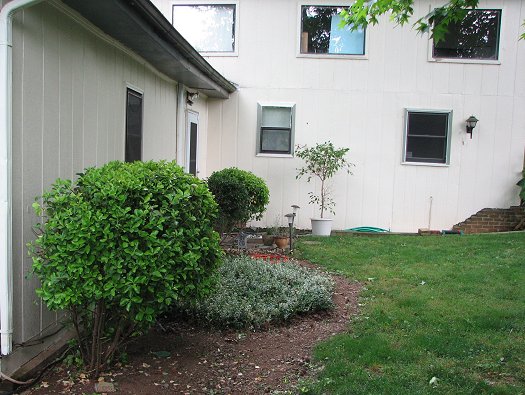
First, the house is about 50 years old. Various prior owners have added bits and pieces to it and then moved on. The Euonymous had already been massively trimmed but had been planted too close to the house. The ground cover needed constant management and was a major snake hiding zone.
Water came from, (right of the picture) higher up the hill, and straight down towards the house and the back door. We also needed more light inside and all the windows you see here needed to be replaced.
All this from a few paver stones and a couple bottles of Heineken on a September 2010 Sunday afternoon! I should have just stayed inside and watched NASCAR!
So while we’re working like Santa’s little elves making paver stones, we called our go-to earth-mover expert to dig us a ditch:
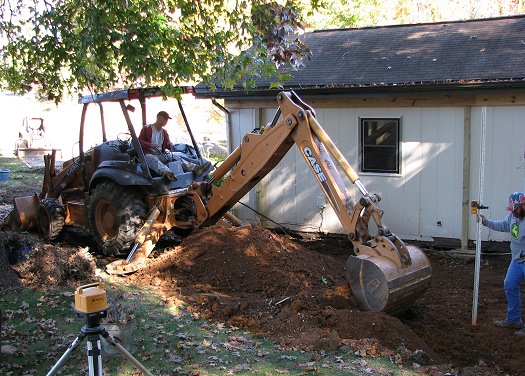
November 2010
These guys have WAY too much fun if you ask me!
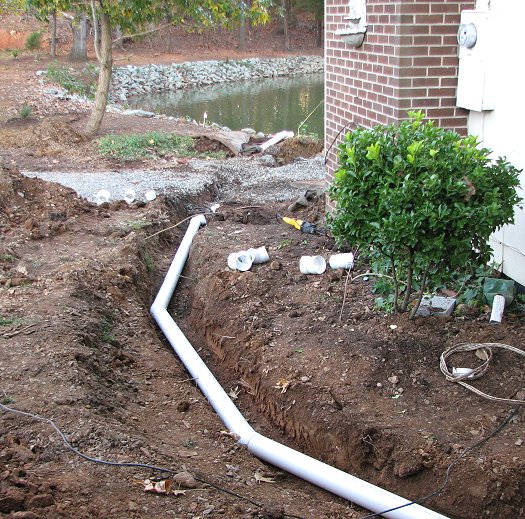
They also put in a French drain to aid drainage and divert the water around and away from the house and out to the lake.
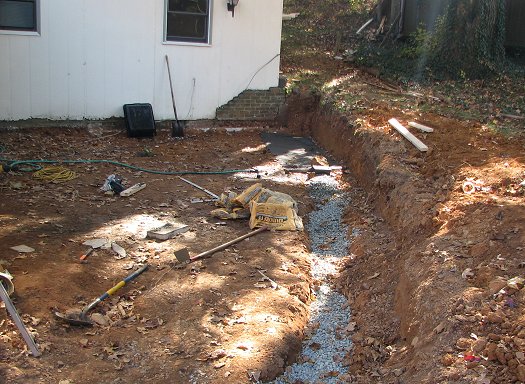
French drain
Where is the stucco you ask?
Getting to this:
June 2011
…hasn’t happened overnight but we’re making progress. First we had to replace those nasty windows and add a new window to gather more light for the living room…that will be coming soon!
Have a great and safe 4th of July weekend!
Design Tool – Outdoor Living Spaces
by admin on Mar.05, 2011, under Favorites, Images
While planning a paver stone design for my new backyard patio I stumbled upon a great tool from Eldorado Stone and Eldorado Outdoor.
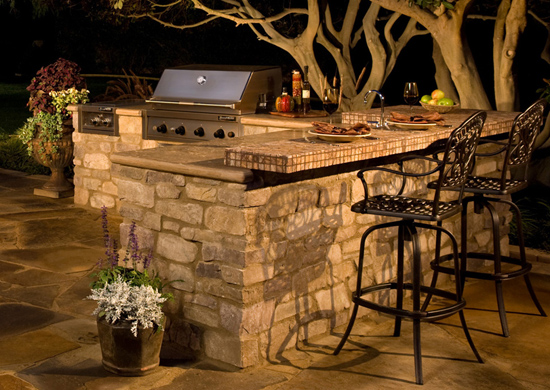
Click anywhere on their “gallery” links and you will have a pretty handy design tool at the ready. They show “before” and “after” views of some really nice outdoor kitchens – the main focus being upgrading with Eldorado Stone products. But, the design tool itself, with a short learning curve, might come in handy for anyone in design-stage of an outdoor living or kitchen area.
There goes a couple hours of my Saturday morning – but time planning is always time well spent.
Read more about creating your own outdoor living space on the Rose Cottage Ltd website.