Archive for July, 2011
Stucco Series – Design and Color Questions
by admin on Jul.07, 2011, under Favorites, Images, Real Estate
There has been a lot of time spent studying stucco over the last 6 months. Who knew that making the choice to use stucco to replace exterior siding would prompt so many design decisions.
I knew I wanted a English cottage appearance but since my name isn’t Hansel or Gretel and I’m not likely to do a thatched roof, I didn’t want this:
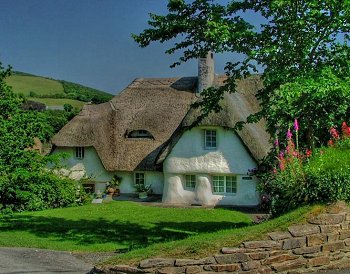
Quaint as it is, it isn’t really my style.
On the other hand, many stuccoed houses I saw ended up looking like commercial buildings or survival bunkers. What I wanted from stucco was a nice clean line and a little interesting texture – along with the added insulation from weather and noise.
I began studying what is known as “Cotswold” style. Close, but no cigar!
This style – along with its sister style Tudor, does not really go well with my one level house. Tudor looks great on large homes and commercial structures. Here is a photo I took of the Hotel Roanoke in Virginia. It is an impressive building, but all this trim color will make my little 1600 square-foot cottage look a little choppy and I will have trim to consider.

Hotel Roanoke, Virginia
I found the website Ontario Architecture which gave me some really good design ideas and an image fairly close to what I wanted.
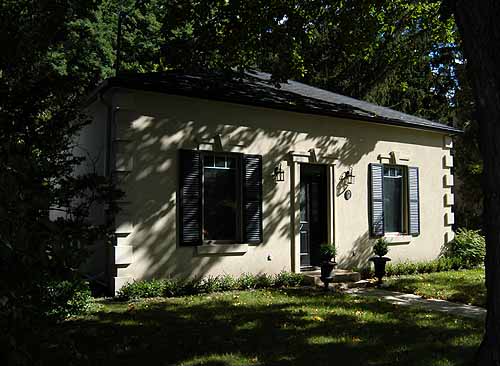
Clean lines, some nice opportunities for architectural design elements, and a natural-look color.
Color? Oh no. What about color? How do you get it, or not?
Back to The Mold Store I went since I’d already purchased powdered colorant for my paver stones. They had quite a few colors, but for my stuccoed walls I want a pearly-gray/white color. Early samples made from the very first stucco mix had the outcome a little too much brown tone for my taste.
Much of this color issue has to do with the sand portion of the stucco mix. Sand comes in a huge variety of shades and it all is certainly not white! Cement has less variety but from what I gather, true, Portland cement is the cleanest and brightest to work with.
Many people do not worry about the base stucco since they plan on painting it. I’m trying to avoid this step. This is not an adobe home with the standard southwestern colors and I really don’t want to have to paint this house after all this work.
A little further research found a whiter sand available nearby and the addition of white powder colorant to the finish mix got the stucco within the color range desired. This was still a little damp when the picture was taken.
Now, that it appeared the color was do-able, and I’m beginning to find ways to make a specific texture on the surface, how the heck do you make this stuff stay on the wall? That’s a story for another day…
Reminder – Hot weather and Hummingbirds…
by admin on Jul.06, 2011, under Images, Real Estate
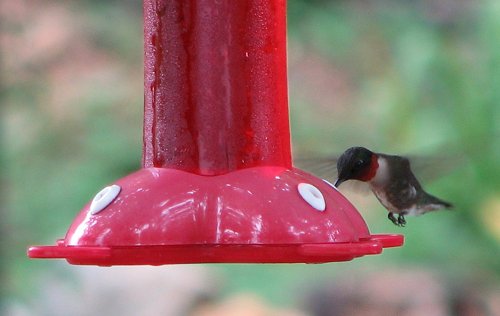
It is pretty hot and humid in North Carolina in July. This year is no exception and made worse by very little rain. Hummingbirds are everywhere since they know they can get fresh nectar at two feeders on the property. They are draining feeders at an incredible clip so if you want them around your home, keep the juice coming…
Stucco Series – From the Ground Up
by admin on Jul.04, 2011, under Favorites, Images, Real Estate
On with the project…
Removing the dirt from the back of the house (see first post), and installing a French drain was a good step in this home improvement process. But the back door was still stuck and the roof had a sway like a camel’s back you can see in image below.
On closer inspection we found the house had evolved from a foundation of wooden posts and railroad ties. After 50 years, the wooden posts were nothing but sawdust leaving the railroad ties resting directly on the ground.
What to do now? We came up with 3 options…
Bulldoze the entire house. Not bloody likely since we are actually living here. Who knows what the mortgage company would have to say.
Hire a contractor. Given that we couldn’t get a local company to come out and replace gutters, we were not confident that anyone could solve this problem. Without a standard foundation wall, hiring a wall-lifting or using a helical pier system like Ram Jack couldn’t even be considered
Fix it ourselves. We chose this option by default.
Using a simple hydraulic jack and heavy timbers we reinforced and leveled the roof – setting the vertical posts on hand-poured concrete footings.

We finished the base of the wall along its entire length with hand-poured concrete. I mention hand-poured concrete twice here because you may be surprised to find that it took 30 bags of Quik-Crete to accomplish this task. Hand mixing Quik-Crete is not a “quick” nor easy process.
Now we have a square, level, functional but bland wall. It still needed something. Let there be light!
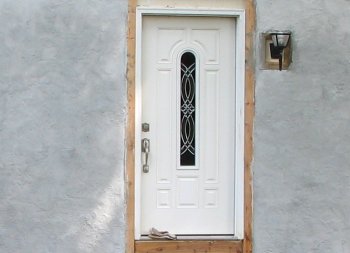
In older homes drafty and undersized windows are a chronic problem. Nothing improves the comfort of the home like energy-efficient dual-pane windows. Big box home improvement retailers have a wide variety to choose from at very reasonable prices. The small window in the wall needed to be replaced and at the time, this was the only window in the living room. We needed a new and bigger option.
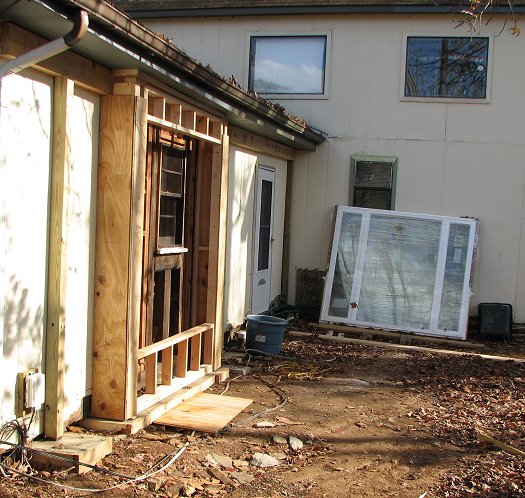
We considered a 3 x 3 foot window and a 4 x 4 foot window. We finally settled on a 7 foot wide by 6 foot tall monster window unit. Apparently this monster window was the subject of much awe and desire by all who viewed it at Lowe’s! Such a substantial window now needed a substantial wall. As with so many projects, what started out as a simple hole in the wall for a window, grew to a framed-out box to add character.
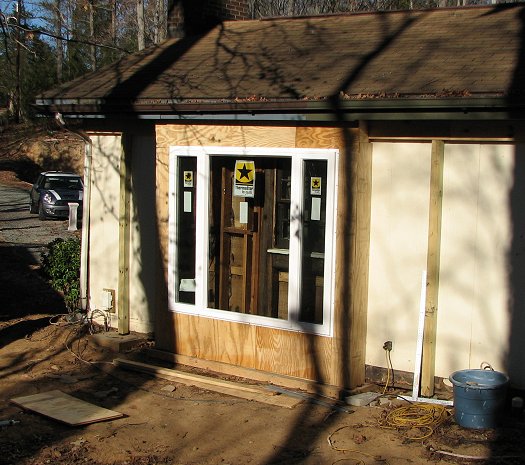
Now to secure the wall and make it weather-tight. We chose stucco.
The wall type had to be weather-tight, well insulated, and attractive – and affordable. We’d never done stucco before but we liked the look for our country cottage. Time to research stucco…
Stucco Series – Reboot
by admin on Jul.01, 2011, under Favorites, Images, Real Estate
Or maybe I should say, “Re-pour!”
I began what I called the “Stucco Series” a few weeks ago and then immediately realized I had started in the middle of the process. I also didn’t have the 9 months worth of info well-organized so…
…starting again – with the paver stones that began this latest round of DIY home improvements.
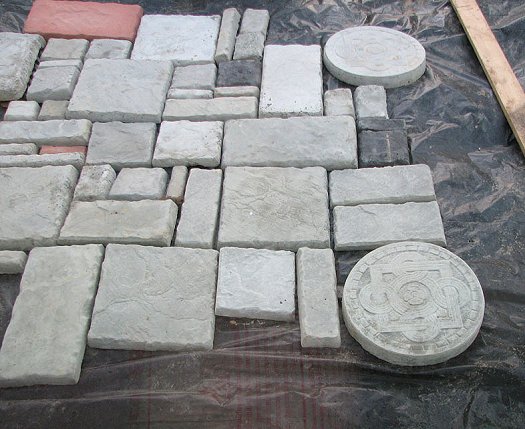
We started off wanting to make some of these:
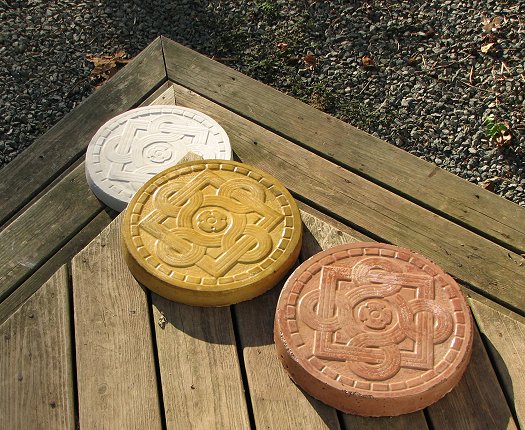
We ordered a package of molds from The Mold Store. They’ve been a really handy resource and have been able to answer our questions about mold sizes and concrete colorant.
As you can see from the image above, we’ve been experimenting with various color effects – the latest being true white – which was harder to achieve than might be imagined. More on that later…
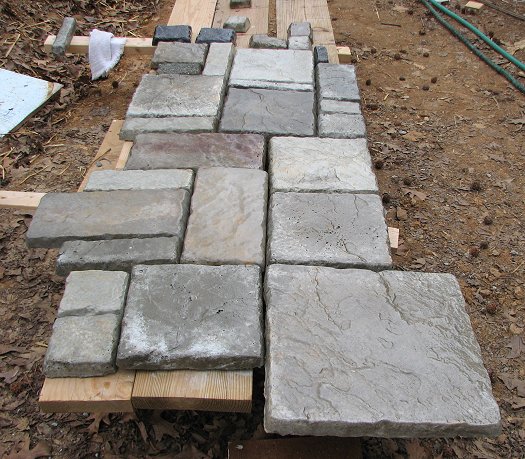
The pavers look like this in their raw state:
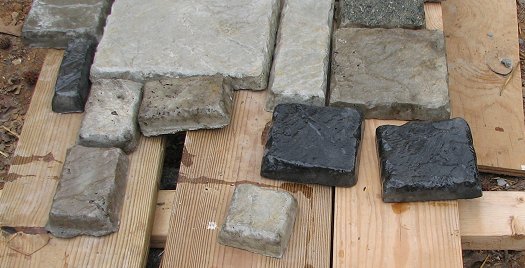
We weren’t super happy with this so decided a coat or two of polyurethane might bring out the texture and color variations to make these pavers look a bit more natural. It worked!
I was particularly pleased with the black pavers.
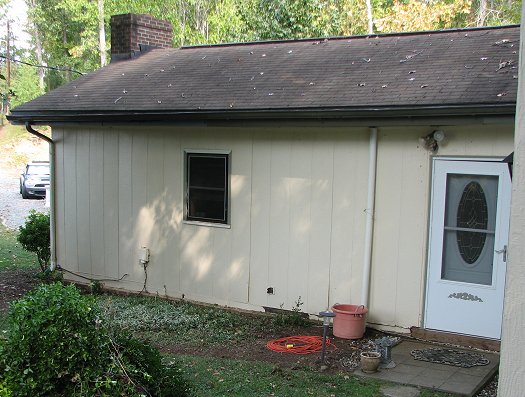
The stucco thoughts began as we were studying the “before” back of the house. This is the area intended for the new patio (and pavers), but there were obvious problems.
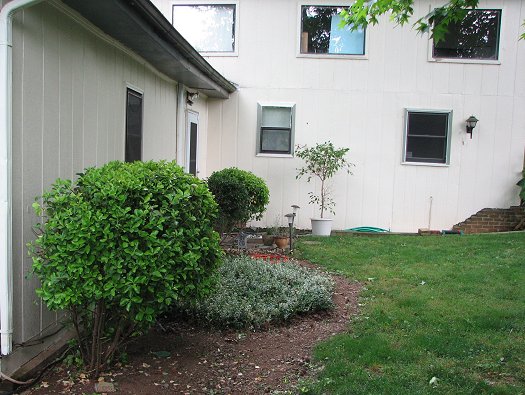
First, the house is about 50 years old. Various prior owners have added bits and pieces to it and then moved on. The Euonymous had already been massively trimmed but had been planted too close to the house. The ground cover needed constant management and was a major snake hiding zone.
Water came from, (right of the picture) higher up the hill, and straight down towards the house and the back door. We also needed more light inside and all the windows you see here needed to be replaced.
All this from a few paver stones and a couple bottles of Heineken on a September 2010 Sunday afternoon! I should have just stayed inside and watched NASCAR!
So while we’re working like Santa’s little elves making paver stones, we called our go-to earth-mover expert to dig us a ditch:
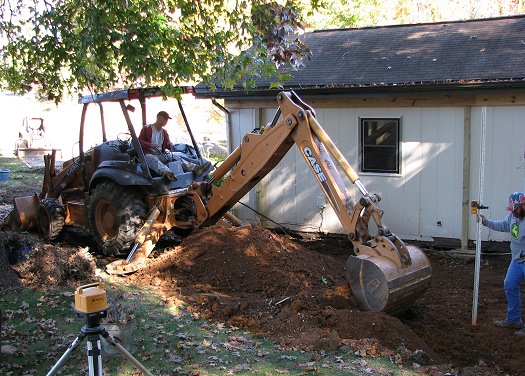
November 2010
These guys have WAY too much fun if you ask me!
They also put in a French drain to aid drainage and divert the water around and away from the house and out to the lake.
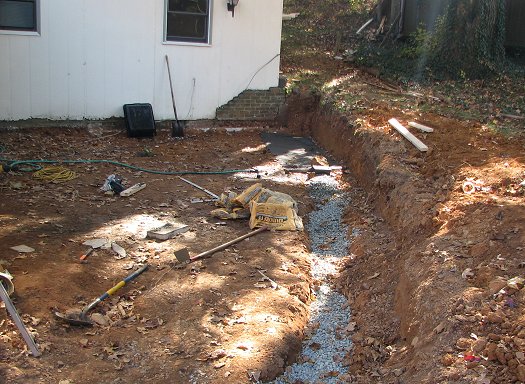
French drain

Where is the stucco you ask?
Getting to this:
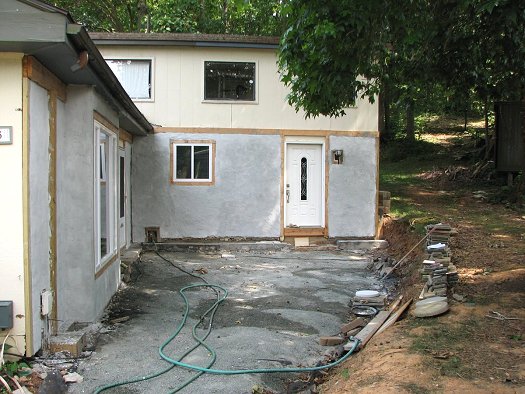
June 2011
…hasn’t happened overnight but we’re making progress. First we had to replace those nasty windows and add a new window to gather more light for the living room…that will be coming soon!
Have a great and safe 4th of July weekend!